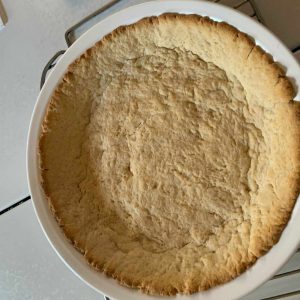
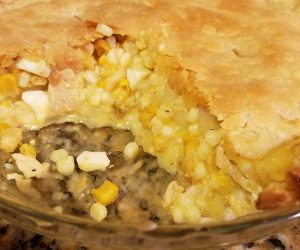
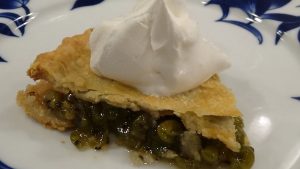
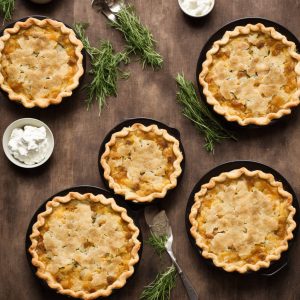
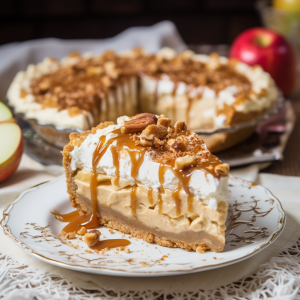
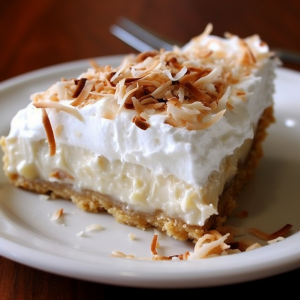
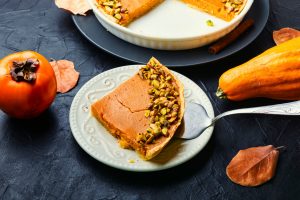
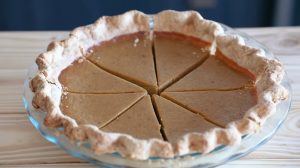
Recipes.net Recipes.net logo
Social Media

Homemade Cherry Pie Recipe

Pie is always a welcome dessert, and this cherry pie recipe is no exception. It's a delightful mix of tart and sweet flavors with a buttery, flaky crust. Although it requires a bit of effort, the end result is well worth it. This pie is perfect for a family gathering, holiday celebration, or just a treat for yourself on a quiet evening.

Homemade Cherry Pie Recipe
0

Photos of Homemade Cherry Pie Recipe

While most of the ingredients in this cherry pie recipe are common pantry items such as flour, sugar, and salt, there are a few ingredients that you might need to check. Cherries, depending on the season, may not be readily available in your local supermarket. Look for fresh cherries in the produce section during the summer months or use canned cherries as a substitute. Unsalted butter is usually preferred in baking for its pure, sweet cream flavor. Cornstarch acts as a thickener for the cherry filling, ensuring it's not too runny.

Ingredients for Homemade Cherry Pie

All-purpose flour: This is used to make the crust of the pie. It provides structure and helps in creating a flaky texture.

Granulated sugar: Adds sweetness to both the crust and the filling of the pie.

Salt: Enhances the other flavors in the pie.

Unsalted butter: Provides moisture and creates a tender, flaky crust.

Ice water: Used in making the pie dough. It helps in binding the ingredients together.

Cherries: The star of the pie filling. They give the pie a tart, sweet flavor.

Lemon juice: Balances the sweetness of the cherries and sugar.

Cornstarch: Acts as a thickening agent for the pie filling. It helps prevent the pie from becoming too runny.

Vanilla extract: Adds a hint of vanilla flavor to the pie.

Egg: Used for egg wash to give the crust a golden brown color.

Milk: Mixed with egg for egg wash. It also helps in browning the crust.

Coarse sugar: Sprinkled on top of the pie for extra sweetness and a bit of crunch.

One reader, Alameda Wood says:

star icon star icon star icon star icon star icon

This homemade cherry pie recipe is a game-changer! The crust is flaky, and the filling is bursting with sweet-tart cherry flavor. It's the perfect dessert for any occasion. I love how easy it is to make, and the end result is always a hit with my family and friends. Highly recommended!

Alameda Wood

Techniques Required for Making Homemade Cherry Pie

How to make pie crust: Combine the sifted flour, salt, and sugar in a large bowl. Use a pastry cutter to mix the cold cubed butter into the flour mixture until crumbly. Slowly add in the ice water and continue to mix with the pastry cutter. Do not overmix; it should be crumbly. Transfer onto a working surface and shape into 2 disks. Cover the disks with plastic wrap and refrigerate for at least an hour (or overnight).

How to make cherry pie filling: Pit the cherries. Cut about ⅓ of the cherries in half, if desired. Combine with lemon juice, vanilla, sugar, and cornstarch.

How to assemble the pie: Roll out the pie crust into about a 12-inch circle and transfer into a 9-inch pie pan. Pat down the pie crust to lay evenly along the pie pan with some crust hanging over the edges. Add the pie filling into the pie crust. Roll out the second pie crust and create the desired design on the pie crust. Place it on top of the pie filling. Pinch together the leftover edges along the sides of the pie, seal, and flute the pie edges. Brush the pie with egg wash and sprinkle with coarse sugar, if desired.

How to bake the pie: Preheat the oven to 400 degrees F. Bake for 30 minutes, then turn down the heat to 350 degrees F and bake for an additional 30 to 35 minutes. If the top of the pie begins to brown and the bottom isn’t done baking, cover the pie loosely with foil until the bottom is done baking.

How to serve: Cool the pie, slice, and enjoy with vanilla ice cream or whipped cream.

How To Make Homemade Cherry Pie

Our homemade cherry pie recipe boasts of a tasty and buttery crust, and a sweet filling made with baked cherries! This recipe is easy to make, too!

Preparation: 15 minutes
Cooking: 1 hour
Chill Time: 1 hour
Total: 2 hours 15 minutes

Serves:

Ingredients

For Pie Crust:

  • 2⅓cupsall-purpose flour,sifted
  • 2tbspgranulated sugar
  • 1tspsalt
  • 1cupunsalted butter,(2 sticks) cold, cubed
  • cupice water

For Cherry Pie Filling:

  • 5cupscherries,pitted
  • 1tbsplemon juice
  • ½cupgranulated sugar
  • ¼cupcornstarch
  • ½tspvanilla extract

For Egg Wash:

  • 1large egg
  • 2tspmilk

For Garnish:

  • 1tbspcoarse sugar,optional

Instructions

Pie Crust:

  1. In a large bowl, combine the sifted flour, salt, and sugar.

  2. Using a pastry cutter, mix the cold cubed butter into the flour mixture until crumbly.

  3. Slowly add in the ice water and continue to mix with the pastry cutter. Don’t overmix, it should be crumbly.

  4. Transfer onto a working surface and shape into 2 disks. Cover the disks with plastic wrap and refrigerate for at least an hour (or overnight).

Cherry Pie Filling:

  1. Pit the cherries. Cut about ⅓ of the cherries in half, if desired. Combine with lemon juice, vanilla, sugar, and cornstarch.

  2. Roll out the pie crust into about a 12-inch circle and transfer into a 9-inch pie pan.

  3. Pat down the pie crust to lay evenly along the pie pan with some crust hanging over the edges.

  4. Add the pie filling into the pie crust.

To Assemble:

  1. Roll out the second pie crust. Create the desired design on the pie crust. Place on top of the pie filling.

  2. Pinch together the leftover edges along the sides of the pie. Seal and flute the pie edges.

  3. Brush the pie with egg wash and sprinkle with coarse sugar, if desired.

  4. Bake in a preheated oven at 400 degrees F for 30 minutes.

  5. Turn down heat to 350 degrees F and bake for an additional 30 to 35 minutes. If the top of the pie begins to brown and the bottom isn’t done baking, cover the pie loosely with foil, until the bottom is done baking.

  6. Cool the pie, slice, and enjoy with vanilla ice cream or whipped cream.

Nutrition

  • Calories: 483.14kcal
  • Fat: 24.19g
  • Saturated Fat: 14.89g
  • Trans Fat: 0.93g
  • Monounsaturated Fat: 6.28g
  • Polyunsaturated Fat: 1.18g
  • Carbohydrates: 62.75g
  • Fiber: 2.84g
  • Sugar: 28.49g
  • Protein: 5.76g
  • Cholesterol: 84.38mg
  • Sodium: 304.93mg
  • Calcium: 29.30mg
  • Potassium: 250.47mg
  • Iron: 2.15mg
  • Vitamin A: 207.26µg
  • Vitamin C: 6.78mg

Crucial Technique Tip for Achieving the Ideal Cherry Pie

When making your cherry pie, it's important to keep your butter cold for the pie crust. This ensures that the butter doesn't melt before baking, which can lead to a tough, rather than flaky crust. To achieve this, you can cube the butter and then freeze it for about 15 minutes before incorporating it into the flour mixture. This will help to keep it solid as you work it into the flour. Additionally, when rolling out your pie crust, try to handle the dough as little as possible to prevent the butter from warming up.

Time-Saving Tips for Preparing Homemade Cherry Pie

Prepare the filling: Use pre-made cherry pie filling to save time and effort.

Frozen cherries: Opt for frozen cherries to skip the pitting process and save time.

Pre-made pie crust: Consider using store-bought pie crust for a quick and convenient alternative.

Cherry pitter: Invest in a cherry pitter to speed up the process of removing cherry pits.

Uniform shape: Cut the pie crust into uniform shapes to ensure even baking and save time on adjustments.

Substitute Ingredients For Homemade Cherry Pie Recipe

  • all-purpose flour - Substitute with whole wheat flour: Whole wheat flour can add a nutty flavor and extra nutrients to the pie crust.

  • unsalted butter - Substitute with coconut oil: Coconut oil can provide a similar richness and flavor to the pie crust, and it's a good vegan alternative.

  • ice water - Substitute with vodka: Vodka can be used instead of water to make the pie crust flakier, as it evaporates quickly during baking.

  • cherries - Substitute with frozen cherries: Frozen cherries can be used when fresh cherries are not in season, and they are often more affordable.

  • granulated sugar - Substitute with honey: Honey can add a natural sweetness and depth of flavor to the cherry pie filling.

  • cornstarch - Substitute with tapioca starch: Tapioca starch can be used as a thickening agent for the cherry pie filling and provides a glossy finish.

  • lemon juice - Substitute with apple cider vinegar: Apple cider vinegar can provide the tartness and acidity needed in the cherry pie filling.

  • vanilla extract - Substitute with almond extract: Almond extract can add a delicious nutty flavor that complements the cherries in the pie filling.

  • coarse sugar - Substitute with turbinado sugar: Turbinado sugar can be used as a crunchy, sweet topping for the pie crust.

Presenting Your Delectable Homemade Cherry Pie

  1. Elevate the pie crust: Create a delicate lattice or intricate design on the pie crust to showcase your attention to detail and craftsmanship. The pie crust should be flaky, golden, and visually appealing.

  2. Garnish with fresh cherries: Place a few whole cherries on top of the pie to add a pop of color and freshness. This not only enhances the visual appeal but also signifies the key ingredient of the dish.

  3. Accompany with vanilla bean ice cream: Serve a quenelle of premium vanilla bean ice cream alongside the pie. The creamy, aromatic ice cream complements the warm cherry filling and adds a luxurious touch to the dessert.

  4. Dust with powdered sugar: Lightly dust the plate with a fine sprinkle of powdered sugar for an elegant and professional presentation. This adds a touch of sweetness and enhances the overall visual appeal of the dish.

  5. Incorporate edible flowers: Introduce a few carefully selected edible flowers to the presentation for a sophisticated and artistic touch. Choose flowers that complement the flavors and colors of the cherry pie for a visually stunning display.

Essential Tools for Crafting the Perfect Cherry Pie

  • Pastry cutter: A tool used to cut butter or shortening into flour when making pie crusts or biscuits. It helps create a crumbly texture in the dough.

  • Rolling pin: A cylindrical tool used to flatten and shape dough for pie crusts, cookies, and pastries.

  • Pie pan: A round, shallow dish with sloping sides used for baking pies. It provides support for the pie crust and holds the pie filling during baking.

  • Baking sheet: A flat, metal sheet used for baking cookies, pastries, and other baked goods in the oven.

  • Foil: A thin, flexible metal sheet used to cover or wrap food for baking or storing.

  • Plastic wrap: A thin, transparent plastic film used to cover and wrap food for storage in the refrigerator or freezer.

  • Mixing bowl: A deep bowl used for mixing ingredients, such as flour, sugar, and liquids, when preparing pie crust or filling.

  • Egg wash brush: A small brush used to apply an egg wash (a mixture of beaten egg and liquid) to the surface of pastries or pies before baking.

  • Oven: A kitchen appliance used for baking and roasting food. It provides the heat necessary to cook the cherry pie to perfection.

  • Spatula: A flat, flexible utensil used for lifting, flipping, and spreading ingredients, such as pie crusts and fillings, during the baking process.

Storing and Freezing Your Homemade Cherry Pie

  • Allow the cherry pie to cool completely before storing or freezing. This usually takes about 2-3 hours at room temperature.

  • To store the pie, cover it tightly with plastic wrap or aluminum foil. It can be kept at room temperature for up to 2 days or in the refrigerator for up to 5 days.

  • If you want to freeze the pie, wrap it tightly with plastic wrap and then aluminum foil. Label the pie with the date and contents. Frozen cherry pie can be stored for up to 6 months.

  • To thaw a frozen pie, remove it from the freezer and let it thaw in the refrigerator overnight. Once thawed, you can reheat the pie in a preheated oven at 350°F (175°C) for about 15-20 minutes or until warmed through.

  • If you have leftover pie filling, you can store it in an airtight container in the refrigerator for up to 5 days or in the freezer for up to 6 months. Thaw frozen filling in the refrigerator before using.

  • For best results, avoid freezing a cherry pie that has already been cut into slices. The exposed filling can cause the crust to become soggy when thawed.

  • If you want to freeze individual slices, wrap each slice tightly in plastic wrap and then aluminum foil. Place the wrapped slices in a freezer-safe container or bag. To thaw, remove the desired number of slices and let them thaw in the refrigerator.

How To Reheat Leftover Cherry Pie

  • Preheat your oven to 350°F (175°C). Place the leftover cherry pie on a baking sheet and cover it loosely with aluminum foil. This will prevent the crust from burning while the filling heats through. Bake for about 15-20 minutes, or until the pie is heated through.

  • If you prefer a crispier crust, remove the foil for the last 5 minutes of baking. This will allow the pie crust to crisp up nicely without drying out the cherry filling.

  • For a quicker method, you can use the microwave. Place a slice of cherry pie on a microwave-safe plate and heat it in 30-second intervals until it reaches your desired temperature. Be careful not to overheat, as this can cause the filling to become too hot and potentially burn your mouth.

  • If you have an air fryer, you can also use it to reheat your cherry pie. Preheat the air fryer to 350°F (175°C) and place a slice of pie in the basket. Heat for 3-5 minutes, or until the crust is crispy and the filling is heated through.

  • For a more unconventional method, try reheating your cherry pie in a skillet. Place a slice of pie in a non-stick skillet over medium heat. Cover the skillet with a lid and heat for 3-5 minutes, or until the bottom of the crust is crispy and the filling is heated through.

  • If you want to add a little extra flavor to your reheated cherry pie, try serving it with a scoop of vanilla ice cream or a dollop of whipped cream. The contrast of the warm pie and the cool, creamy topping is simply divine.

Random Fact About Cherry Pie

The cherry pie is a classic American dessert that has been enjoyed for centuries. It is said that the first cherry pie was made in the United States by early American settlers. Cherries are a rich source of antioxidants and have been linked to various health benefits, including reduced inflammation and improved sleep. Cherries are also a natural source of melatonin, which can help regulate sleep patterns. So, enjoying a slice of homemade cherry pie not only satisfies your sweet tooth but may also contribute to a good night's sleep.

Is Making Cherry Pie at Home Cost-Effective?

This homemade cherry pie recipe is relatively cost-effective for a household. The main cost lies in the cherries, but the simple ingredients for the crust and filling are budget-friendly. The approximate cost for a household of 4 people is around $12-$15, making it an affordable dessert option. The overall verdict rating for this recipe is 9/10, considering the delightful flavors and the economic value it offers.

Is Homemade Cherry Pie Healthy or Unhealthy?

The homemade cherry pie recipe, while delicious, is not particularly healthy due to several factors:

  • The pie crust contains a significant amount of butter and refined flour, which are high in saturated fat and simple carbohydrates, respectively.
  • The cherry filling is high in sugar, contributing to the overall calorie count and potentially raising blood sugar levels.
  • The recipe calls for a sugary egg wash and additional coarse sugar for garnish, further increasing the sugar content.

However, there are some redeeming qualities, such as the use of fresh cherries, which provide vitamins, minerals, and antioxidants. The lemon juice also adds a small amount of vitamin C.

To make this recipe healthier, consider the following suggestions:

  • Replace half of the all-purpose flour with whole wheat flour or almond flour to increase the fiber content and reduce simple carbohydrates.
  • Reduce the amount of sugar in the cherry filling by 25-50%, depending on the natural sweetness of the cherries. You can also experiment with natural sweeteners like honey or maple syrup.
  • Use a smaller amount of butter in the crust or replace half of it with a healthier fat, such as coconut oil or olive oil.
  • Skip the egg wash and coarse sugar garnish to reduce the overall sugar content.
  • Serve smaller portions of the pie and pair it with a dollop of Greek yogurt instead of ice cream or whipped cream for a protein boost and reduced calorie intake.

By making these adjustments, you can create a more balanced and nutritious cherry pie that still satisfies your sweet tooth. Remember, moderation is key, and enjoying a slice of homemade pie occasionally can be part of a healthy lifestyle when paired with a balanced diet and regular physical activity.

Editor's Thoughts: My Take on This Classic Dessert

The homemade cherry pie recipe is a classic and delightful dessert. The pie crust is perfectly flaky and buttery, providing a wonderful contrast to the sweet and tangy cherry filling. The addition of vanilla and lemon juice enhances the flavors, creating a well-balanced and delicious pie. The instructions are clear and easy to follow, making it accessible for both novice and experienced bakers. Overall, this recipe is a winner and is sure to impress anyone who tries it.

Enhance Your Homemade Cherry Pie Recipe with These Unique Side Dishes:

Mashed Potatoes: Create a creamy and buttery mashed potatoes with a hint of garlic for a comforting and hearty side dish.
Grilled Vegetables: Whip up a colorful and flavorful medley of grilled vegetables, seasoned with herbs and olive oil for a healthy and vibrant accompaniment to the cherry pie.
Fruit Salad: Prepare a refreshing and juicy fruit salad with a mix of seasonal fruits, drizzled with a zesty citrus dressing to complement the sweetness of the cherry pie.

Alternative Recipes Similar to Cherry Pie

Homemade Apple Crisp: This delicious dessert is perfect for fall and uses fresh apples, cinnamon, and a crunchy oat topping.
Grilled Vegetable Skewers: These skewers are a great way to enjoy a variety of vegetables, such as bell peppers, zucchini, and mushrooms, with a flavorful marinade and charred grill marks.
Beef Stew with Red Wine: This hearty stew is made with tender beef, carrots, potatoes, and a rich red wine broth, perfect for a cozy dinner on a chilly evening.

Appetizers and Main Courses to Serve with Homemade Cherry Pie

Appetizers:
Stuffed Mushrooms: Impress your guests with these savory stuffed mushrooms, filled with a delicious mixture of cream cheese, garlic, and herbs. The perfect bite-sized appetizer to kick off any meal.
Bruschetta: Elevate your appetizer game with these flavorful bruschetta bites, topped with a fresh and zesty tomato and basil mixture. A classic Italian dish that never fails to please.
Main Courses:
Chicken Alfredo: Creamy and indulgent, this dish features tender pieces of chicken in a rich and velvety Alfredo sauce, served over a bed of perfectly cooked pasta. The flavors are perfectly balanced, making it a comforting and satisfying meal for any occasion.
Beef Stroganoff: Tender strips of beef are cooked in a savory and creamy sauce, then served over a bed of buttery egg noodles. The dish is packed with flavor and the beef is perfectly tender, making it a hearty and delicious meal that is sure to please.

Why trust this Homemade Cherry Pie Recipe:

This homemade cherry pie recipe is a tried and true classic, perfect for any occasion. The cherries are the star of the show, providing a burst of sweet and tart flavor in every bite. The flaky, buttery pie crust is made from scratch, ensuring a delicious base for the luscious cherry filling. With simple, wholesome ingredients like unsalted butter and vanilla extract, this recipe captures the essence of traditional baking. Trust in the timeless appeal of this cherry pie, and savor the comforting aroma and taste of a homemade dessert.

Want to share your own cherry pie recipe or discuss baking tips and techniques? Join the conversation in the Baking and Desserts forum and let's talk about this delicious Homemade Cherry Pie Recipe!
FAQ:
How can I prevent my cherry pie crust from becoming soggy?
To prevent a soggy crust, you can blind bake the bottom crust before adding the filling. Simply line the pie crust with parchment paper, fill it with pie weights or dried beans, and bake it in a preheated oven at 425°F for about 15 minutes. Then, remove the weights and parchment paper, and continue baking for another 5-7 minutes until the crust is golden brown. This will create a barrier and help keep the crust crisp.
Can I use frozen cherries instead of fresh ones for the pie filling?
Yes, you can use frozen cherries if fresh ones are not available. Just make sure to thaw and drain them thoroughly before using in the pie filling. You may also need to adjust the sugar and cornstarch quantities based on the sweetness and juiciness of the frozen cherries.
How do I know when the cherry pie is done baking?
The cherry pie is done baking when the crust is golden brown and the filling is bubbling. You can also insert a knife into the center of the pie, and if the cherries offer little resistance, it's a sign that the pie is ready.
Can I make the pie crust in advance?
Absolutely! You can prepare the pie crust ahead of time. After shaping the dough into disks, wrap them tightly in plastic wrap and store them in the refrigerator for up to 2 days, or in the freezer for up to 2 months. Just make sure to thaw the dough in the refrigerator before rolling it out.
How should I store any leftover cherry pie?
If you have any leftover cherry pie, you can store it at room temperature for up to 2 days. Beyond that, it's best to refrigerate the pie, where it will stay fresh for an additional 2-3 days. Make sure to cover it with plastic wrap or aluminum foil to prevent it from drying out.

Was this page helpful?

Chat Bubble Icon Share your own special recipe
Submit Your Own Recipe

Have your own special recipe to share? Submit Your Recipe Today!