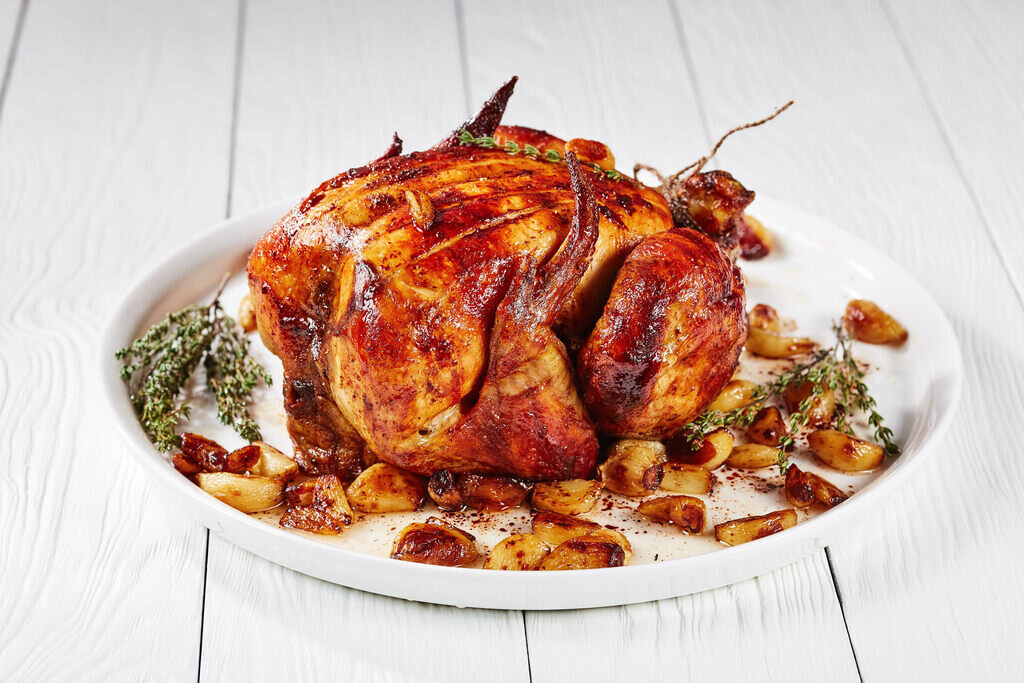
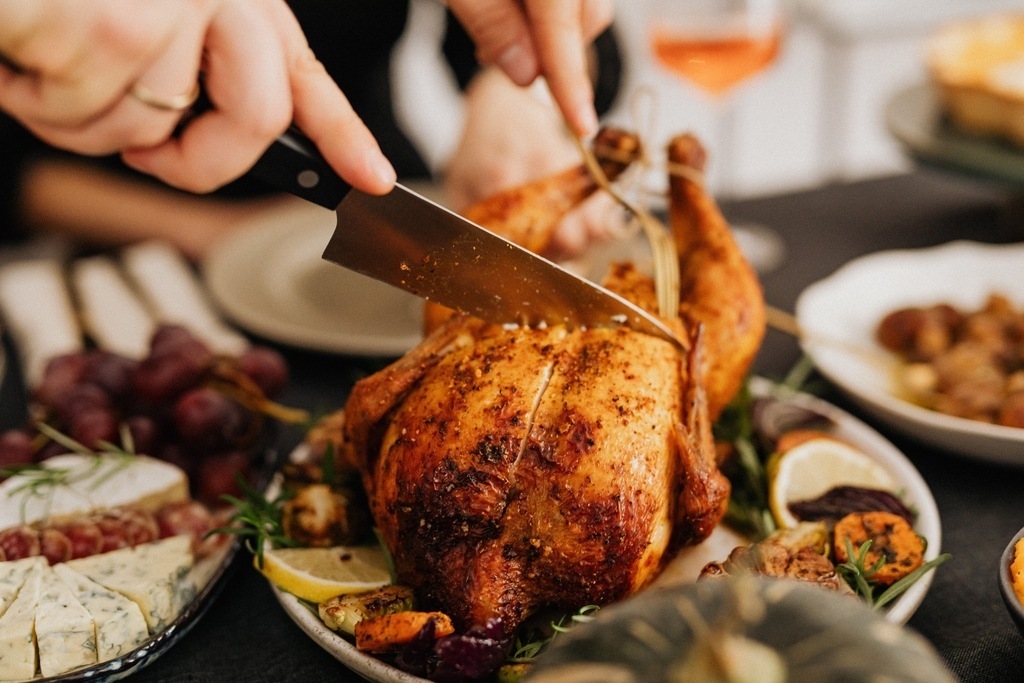
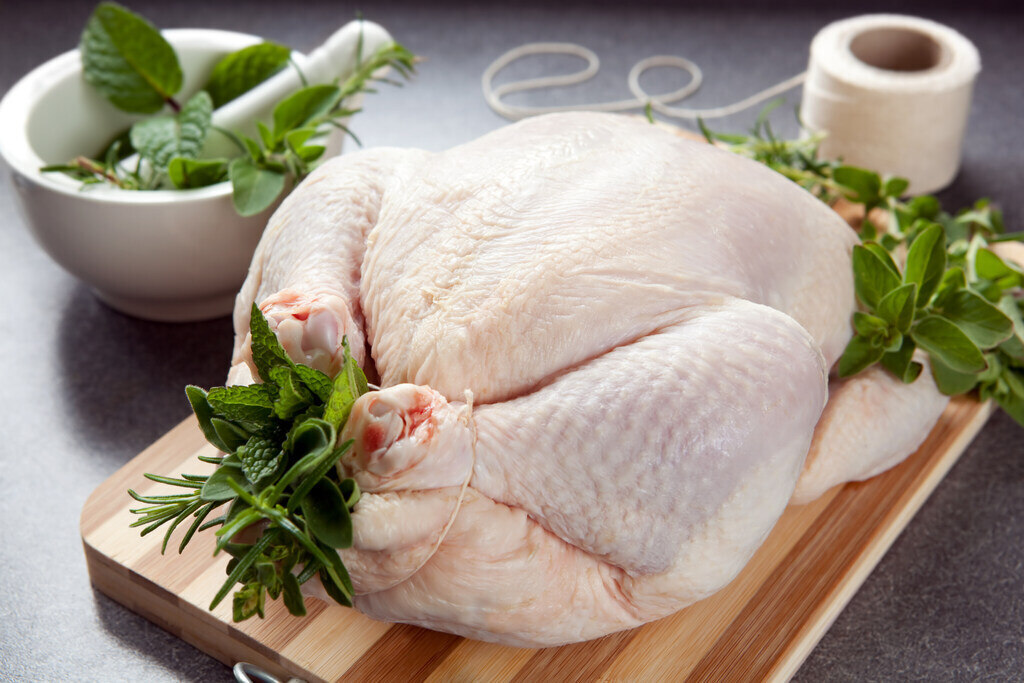
Brining and carefully following recipes are the first things that come to mind when we’re roasting chicken and turkey. Trussing comes last. And some don’t even think about it at all! Now even though it doesn’t look like it, trussing your chicken is actually a crucial step before roasting them. Aside from using a good rotisserie oven, trussing helps the chicken achieve an even beautiful roast. It also ensures it’s evenly cooked. How? It keeps the legs and wings in place so it does not shake and flop around while rotating in the oven. Indeed, if you want a table-worthy rotisserie chicken, then learning how to truss a chicken is definitely a skill to have.
Continue reading and we’ll show you how to truss a chicken the easiest way. By the time you finish this article, you’ll know a thing or two about the staple process! You never know, maybe it’ll help you make the best-roasted chicken yet.
What Is Trussing?
Trussing is fairly easy to understand despite how daunting the task may seem if you’re a first-timer. Trussing simply refers to the technique of tying poultry for cooking. It entails tying up the legs and wings of either chicken, capon, or turkey before roasting. Though trussing is mainly reserved for rotisserie, it also works well for barbecue and grilling.
How to Truss a Chicken: 2 Easy Methods
There are two ways you can truss poultry: string and stringless trussing. In this section, we’ll show you step-by-step guides on how to truss a chicken the traditional way and how to truss chicken without string (also called the stringless trussing method).
Traditional Trussing Method (Using Butcher’s Twine)
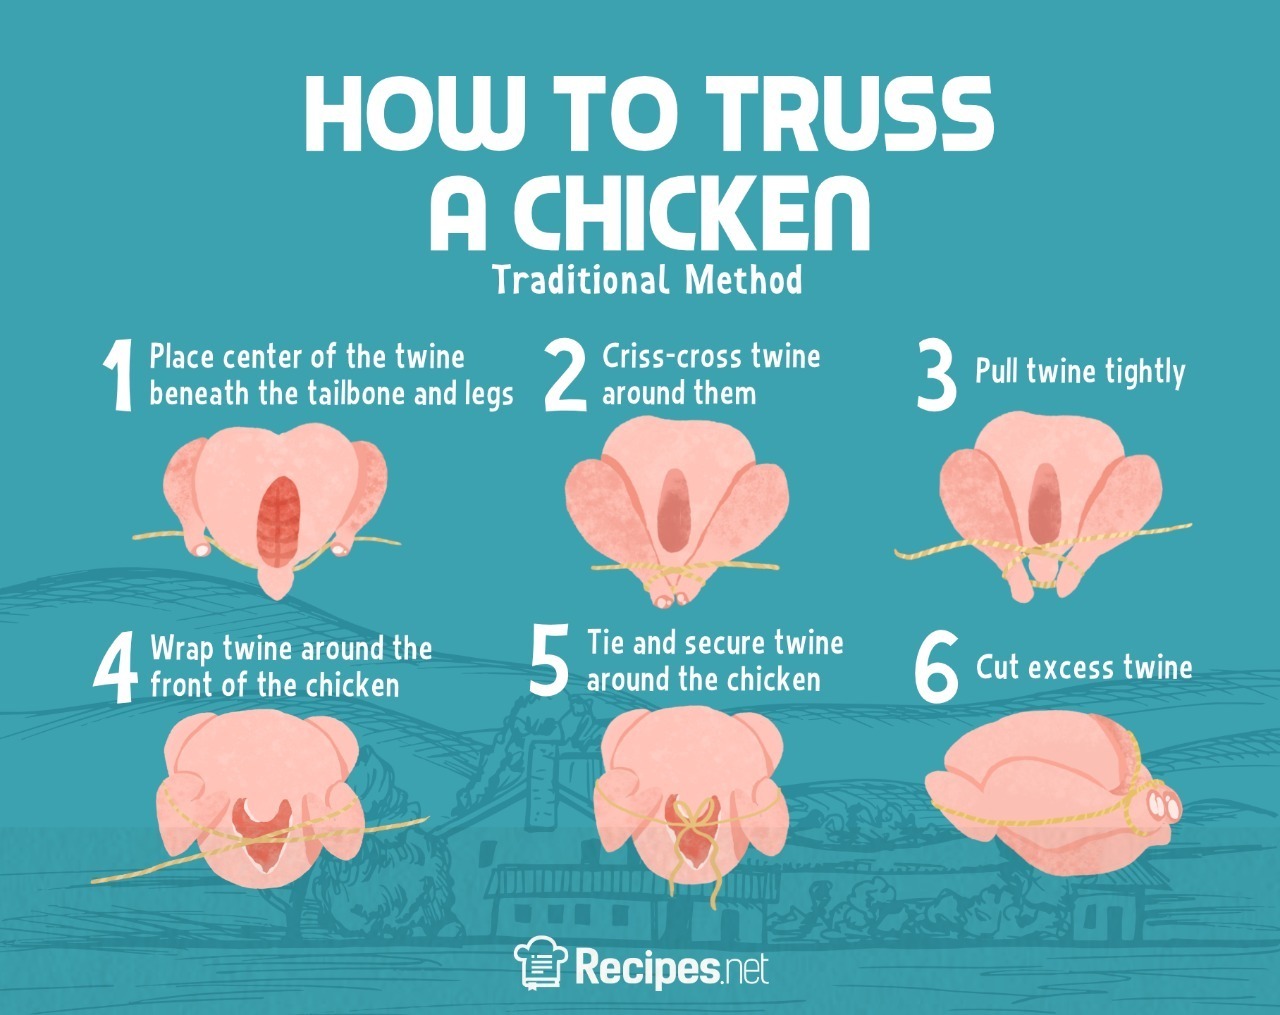
For the traditional method, here’s what you have to do:
- Place chicken on a clean workbench. Begin by patting the chicken dry using a clean kitchen towel or paper towel.
- Get your cooking twine or your tool of choice. For average-sized chicken, cut 3 feet of twine.
- Breast side up, position the legs towards you. Place the center of the twine directly beneath the tailbone and the legs.
- Intertwine the string around the legs and tailbone. Pull the string up using both hands and cross it over the legs and tailbone.
- Next, pull the twine tight. Holding both ends of the twine, gently and carefully pull the twine while ensuring the legs and the tailbone come together.
- Wrap twine around the front of the chicken. While holding both ends of the twine, wrap it around the body towards the neck of the chicken still crisscrossed. Now, the neck should be facing you. Flip it upside down.
- Tie and secure twine around the chicken. At this point, check if there’s any loose knot. Redo if necessary.
- Cut excess twine and you’re done! Your trussed chicken is ready for roasting or for the rotisserie skewer.
READ ALSO: Top 10 Roasting Pans To Get in 2021
Stringless Trussing Method
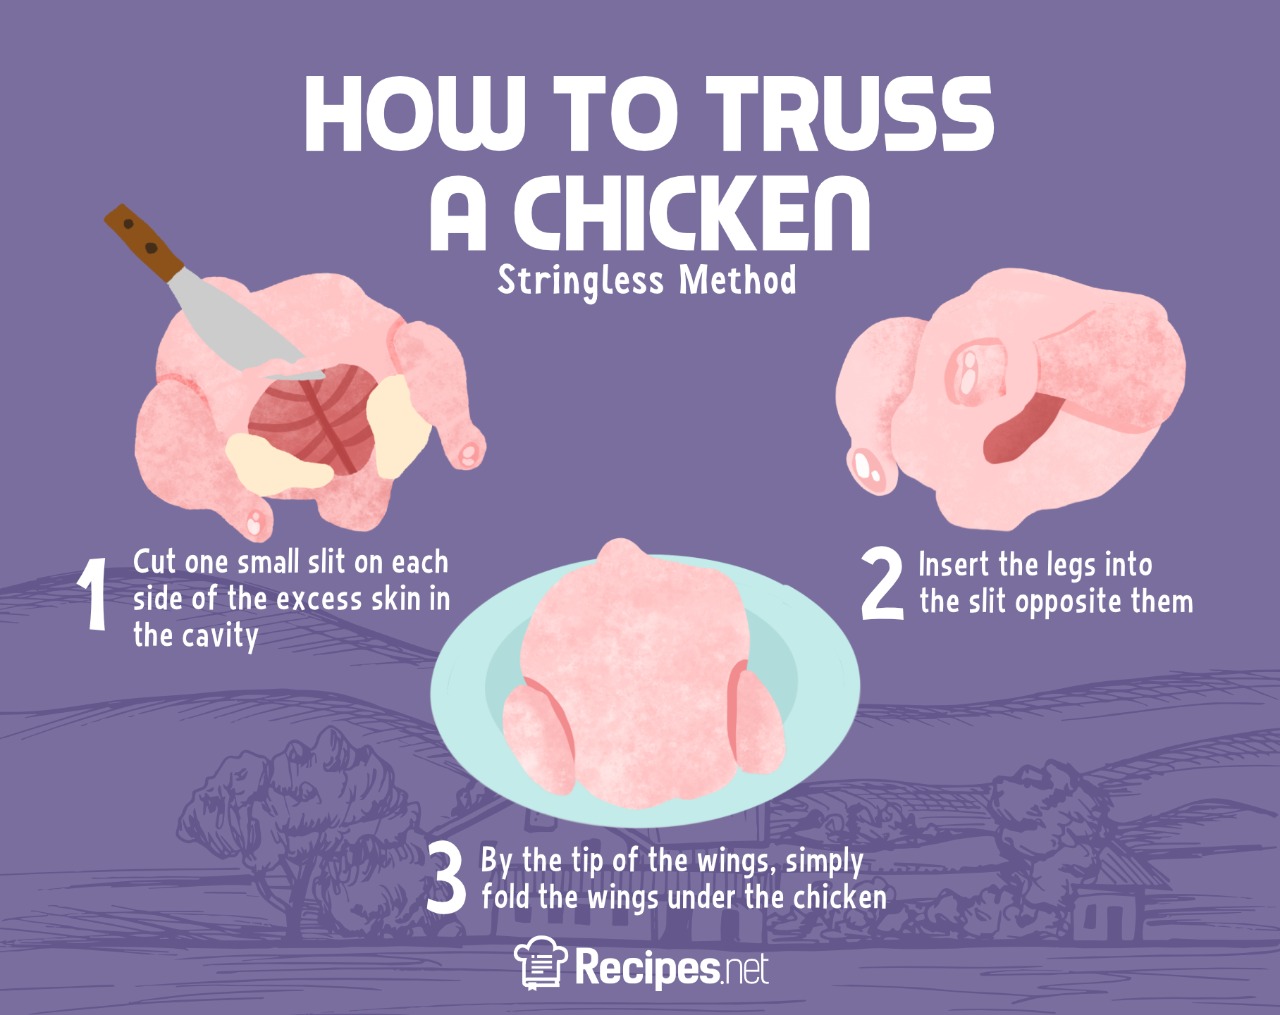
If you’re not fond of using twine or any inedible objects in your food, consider using the stringless trussing method. You’ll only need a paring knife or any sharp knife and cutting board.
Just follow these easy steps for the stringless trussing method:
- Cut slits into the excess skin on either side of the cavity. Using a paring knife, cut one small slit on each side of the excess skin in the cavity. Center the cut and it should be small enough to fit the leg of the chicken.
- Cross legs and tuck. Insert the legs into the slits opposite each other so that the legs end up crisscrossed together. It should tuck tightly like the legs are hugging the body of the chicken. Do this on both sides.
- Tuck and fold the wings. By the tip of the wings, simply fold the wings under the chicken. You’re done!
Why Truss a Chicken
Is trussing necessary? Yes and no. We recommend trussing the chicken first if you want an even roast — that is if you’re not planning on stuffing your chicken. If you want to stuff your poultry with this delicious cranberry stuffing, there’s a good chance that it’s enough to keep the breast moist and juicy. Otherwise, trussing is necessary.
Aside from helping your chicken achieve an even roast, trussing also guarantees that the legs and wings don’t burn before the rest of the chicken is cooked through. Hot air can also pass through the breast cavity if you leave it open. Because of this, the chicken will dry out and lose all its juices. To sum it up, trussing helps your poultry achieve an even beautiful roast. It also guarantees a well-cooked inside without drying it up and ridding it of savory juices.
READ ALSO: What Is Capon: How To Cook It and Recipes To Try
What Can I Use to Truss a Chicken?
There are several tools you can use, but the most common tool would be a butcher’s twine. If you run out of it, you can always use other options. After all, twine is hardly a roasting essential unlike roasting pans and turkey basters.
In this section, we’ll show you tools you can use to truss poultry, including substitutes in place of a butcher’s twine.
Butcher’s Twine
Butcher’s twine (also called kitchen twine and cooking string) is the traditional tool for trussing a chicken. That is because the plain and unbleached cotton twine is strong enough to hold any poultry without burning or imparting flavors, aromas, and colors into your roast. For this reason, this has been the go-to material whenever you need to use string for cooking.
However, that doesn’t mean you can’t substitute it with other tools below:
Dental Floss
Dental floss is another tool you can use in the kitchen. Aside from using it to cut even layers of cake, you can also use it to truss your poultry. If you’re thinking it might not be able to hold it, then you’re mistaken. It can hold roast just as nicely and securely as the kitchen twine. If you’re planning on using this tool, just be sure to use the unwaxed and unflavored dental floss. Otherwise, you’ll risk contaminating your meat with mint from the floss.
Skewers or Toothpicks
Toothpicks are another popular tool for keeping meat in place while you’re cooking them. So like how you would use it for rolled meats when using an electric skillet, it’s perfectly capable of securing your meat in place for roasting. Now there’s just one thing you need to know before using this tool: soak them in water first. A minimum of 20 minutes is enough but you can soak them for up to three to four hours, just to be sure they won’t burn.
Aluminum Foil
There are two ways you can go about using aluminum foil as a trussing or a roasting tool. First, you can try rolling foil into a rope. Use it like you would twine and dental floss. There’s a catch, however. It’s not as secure as the others on this list, but it does the job. You just have to pay extra attention to trussing if you’re using this tool.
The second way is not so much as trussing, but more like using it as a cover. We recommend doing this method if you run out of alternatives for kitchen twine. Just simply wrap the wings and legs with foil to avoid charring and burning.
Other Substitutes
If you don’t have any of these you can also use cheesecloth strips, food grade-silicone bands, crochet, and sewing threads. Although they are significant substitutes, you should use them with caution as they can easily burn, unlike twine. If you ever found yourself using these options, soak them first like toothpicks. However, bear in mind that colored threads may dye your food or even impart smell so be careful in choosing threads and clothes you will use.
Delicious Roast Recipes You Can Try at Home

Now that you know how to truss a chicken, you’re ready to truss your favorite roast. This is also the perfect opportunity for you to try new recipes. Maybe our list of recipes below can inspire you.
- Roast Farmers Chicken Recipe — Here’s something simple and easy for your first try at trussing! This dish may have been roasted until it’s crispy, but you’ll find the chicken still juicy and delicious. What’s more is that compared to other roasted chicken, this one is quicker to prepare and cook. It will only take at least an hour and a few minutes.
- Copycat Boston Market Rotisserie Chicken — If you’re ready to take on something more complicated, then try this well-loved recipe! Pair it with mashed potato and gravy and you’ll have the most satisfying pairings for roasted chicken.
- Classic Roasted Turkey Recipe — If you want something more classic, try this classic roasted turkey recipe stuffed with lemon, onion, thyme sprigs, and garlic. In just three hours you’ll have a flavorful feast.
- Roasted Capon Chicken Recipe — Here’s another roast recipe you can cook for Thanksgiving and other special occasions. This one is made with capon chicken that’s been seasoned with a bag of aromatics as it slowly roasts in the oven.
Knowing How to Truss a Chicken Is a Valuable Cooking Skill
Learning how to truss a chicken can be a daunting task at first. But you’ll find that it’s easy and actually fun to do once you get the hang of it. Plus, it’s an essential skill in the kitchen if you love a picture-perfect dinner table during Thanksgiving and other special occasions.
Was this page helpful?
Read Next: 17 Best Tea Brands For Your Next Tea Party
Related Articles

17 Best Tea Brands For Your Next Tea Party

15 Ways To Take Your Morning Coffee To The Next Level

Licor 43: An Amazing Vanilla Liqueur You Should Definitely Try
How Many Cups in a Quart, a Pint, and a Gallon?

Sweetbreads: What Are They and How to Cook Them

Oven Temperature Conversion Guide For Baking, Roasting, and More

What Is Tomato Passata? How To Make It and Recipes To Try

What Are Red Pistachios and What Happened To Them?

How Many Teaspoons in a Tablespoon?

What Is Escarole and How Is It Used In Cooking?

15 Best Canned Chili Options for Breezy Cooking