If you’ve tried Japanese cuisine before, then you’ve definitely noticed the different array of colorful and tasty side dishes on the table. Some would argue that they are just as important as the main dish. After all, some sides are used to refresh your palate once the food becomes extra greasy. One of these is the popular Japanese side dish called oshinko.
Oshinko is a pickled side dish that can be enjoyed with lots of Japanese dishes such as tasty shrimp tempura. In addition to it being a famous side, you can also use it in sushi rolls (called oshinko sushi or oshinko maki).
Curious to know more about what oshinko is? To get you started, continue reading to find out how you can make it, its difference from other pickled vegetables, and how you can turn it into amazing sushi rolls!
What is Oshinko?
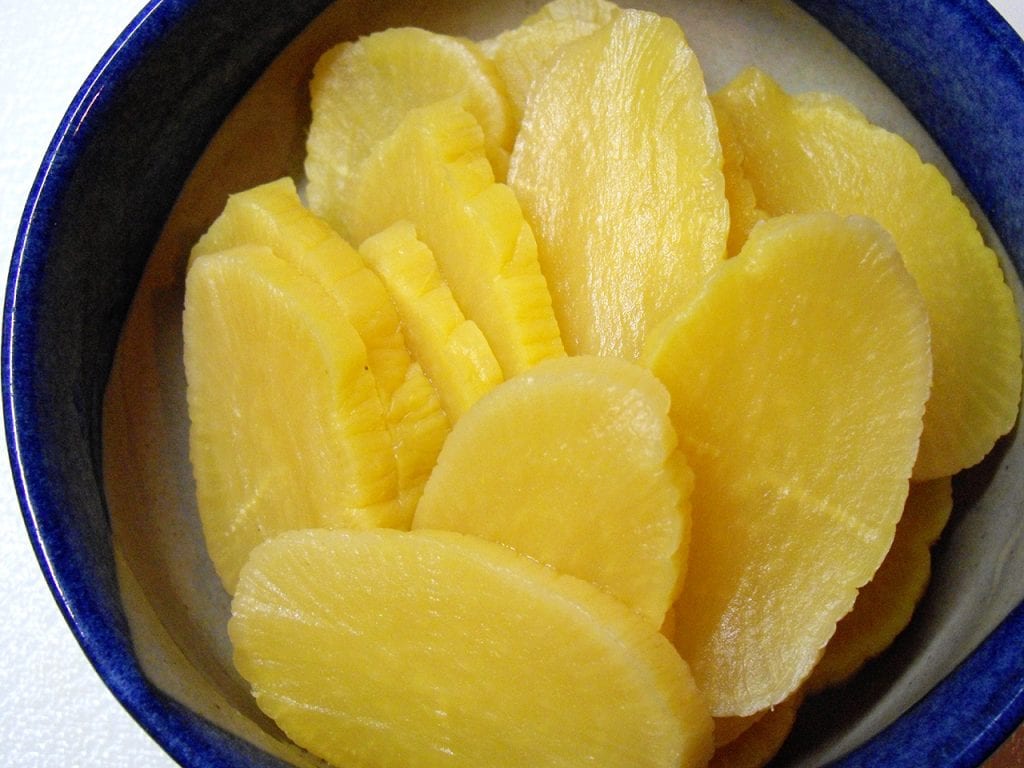
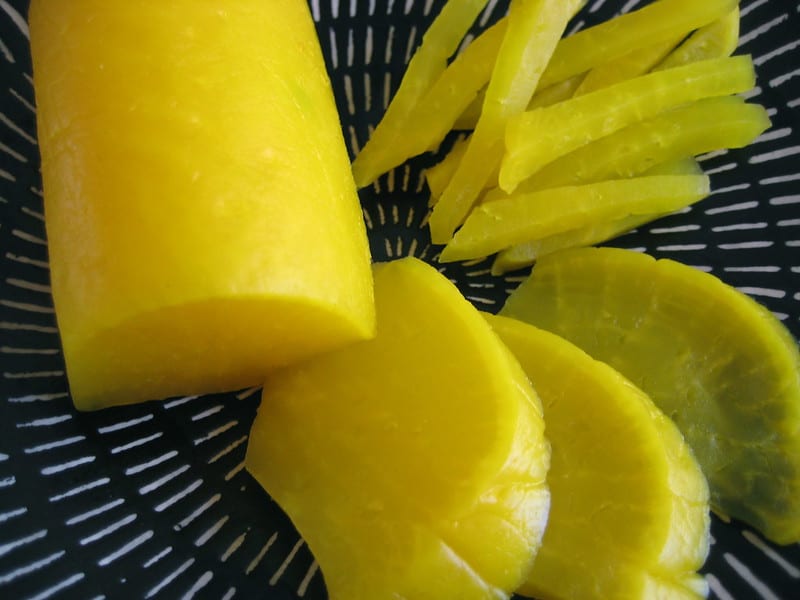
Oshinko, which means “fragrant dish” in Japanese, is made of daikon radish that’s been lightly pickled and stored in a jar or airtight container. The radish used is commonly white. However, it turns yellow once pickled because of the seasonings added.
READ ALSO: 6 Reasons Why You Should Shop At A Farmers Market
In Japanese cooking, you can also use carrots and cucumbers aside from daikon radish. But nowadays, people prefer to use the latter ingredient. Similarly, oshinko has a counterpart in Korean cuisine called danmuji which often accompanies jjajangmyeon (or Korean black bean noodles).
What Does Oshinko Taste Like?
Oshinko is made from daikon radishes which are slightly sweet and mildly peppery before being pickled. It is prepared with various seasonings such as vinegar, salt, and sugar. However, you can opt to add some red chili peppers for extra spice. You may also add some turmeric or food coloring to get the signature yellow color of the side dish.
Contrary to its bright yellow color, oshinko has a sour yet salty taste, with a light pickling flavor. You can compare its taste to a mildly flavored carrot, perhaps. For this reason, it’s also a very good palate refresher for dishes with a very strong umami taste, such as beef teriyaki.
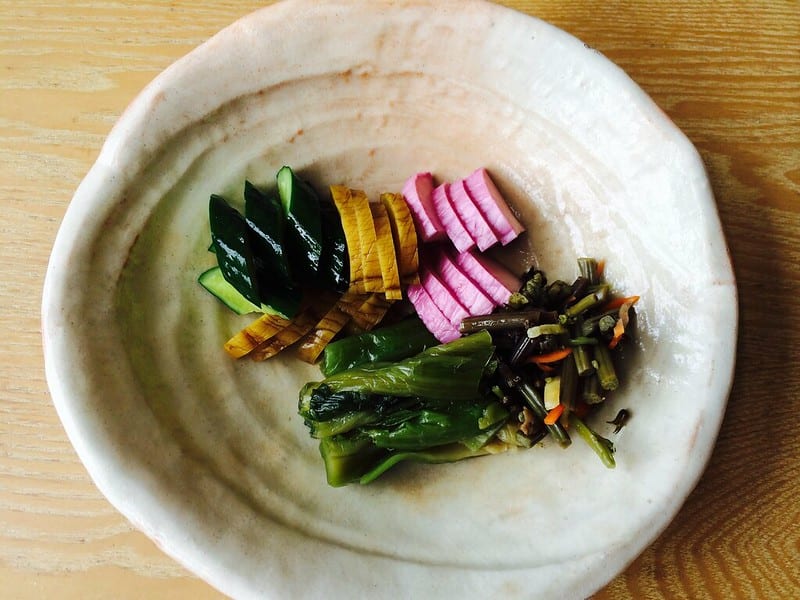
Oshinko vs Tsukemono vs Old Takuan
Considering the number of side dishes and pickled food Japanese cuisine has, it’s not surprising if you confuse this pickled daikon radish with other varieties like tsukemono and takuan.
Flickr | Juha Uitto
Tsukemono is a traditional term in Japan which translates to “pickled things”. It is the umbrella term for all Japanese pickles, including fish roe and the famous umeboshi (pickled plums). In modern Japanese cuisine, people use oshinko as a classy way to say tsukemono. However, oshinko is actually a type of pickled side dish that falls under tsukemono.
Furthermore, oshinko uses rice vinegar and salt for pickling, while tsukemono uses all kinds of different pickling ingredients depending on the dish.
Wikimedia Commons | puamelia
Aside from tsukemono, people also confuse oshinko with takuan. While takuan also uses daikon radish as its main ingredient, the two are not to be interchanged. The way they are prepared is quite distinguishable.
Oshinko is only pickled with salt and vinegar for weeks. Meanwhile, takuan is made by pickling the daikon radish and then fermenting it with more salt and rice bran. Oshinko is also quite easy and quick to prepare compared to some Japanese side dishes. For this reason, home cooks favor this quickly pickled daikon over other varieties.
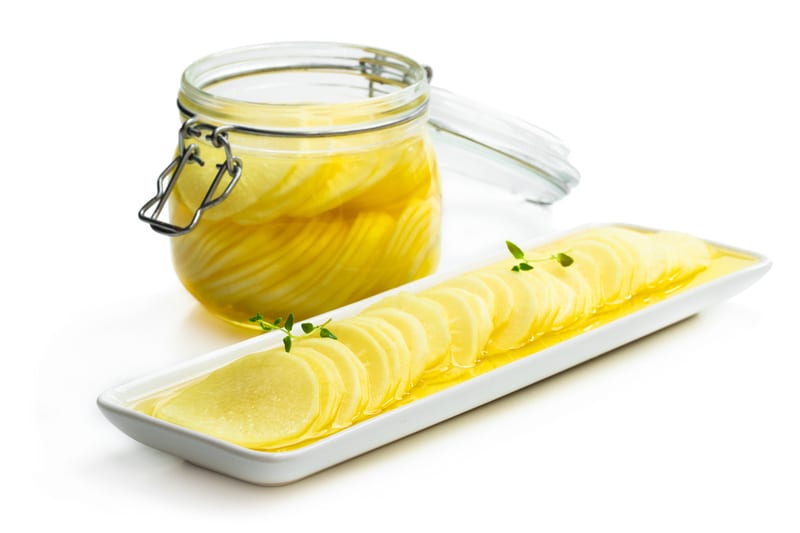
How to Make Oshinko
Flickr | kattebelletje
This pickled daikon radish is actually very easy to prepare. But if it’s your first time making this side dish, we suggest you try it in an authentic Japanese restaurant first so you can get an idea of how it tastes. Or better yet, buy one in an Asian grocery store near you before making it at home.
Whatever you choose to get a head start with this pickled vegetable, always remember not to pick just any radish. You specifically need daikon radishes. Why not red radishes you may ask? Because red radishes are actually peppery in taste, whereas daikon radishes are mild and sweeter, making them perfect for pickling.
To make this pickled daikon radish, just follow these easy steps:
- Peel your daikon radish. You can use a knife or your handy potato peeler for this step.
- Slice it into strips. Using a sharp knife, slice your daikon radish into thin and bite-sized pieces.
- Prepare your jar. Place the sliced daikon radishes in the jar then set aside.
- In a bowl, mix two tablespoons of vinegar, one tablespoon of salt, and ⅔ cup of sugar. You may also add red chili pepper if you desire.
- Pour the mixture into your jar of pickled radish. Make sure you cover all of the daikon strips with the mixture.
- Refrigerate. Store in the fridge for at least two to three days to give it ample pickling time.
READ ALSO: 15 Best Electric Knives To Get In 2022
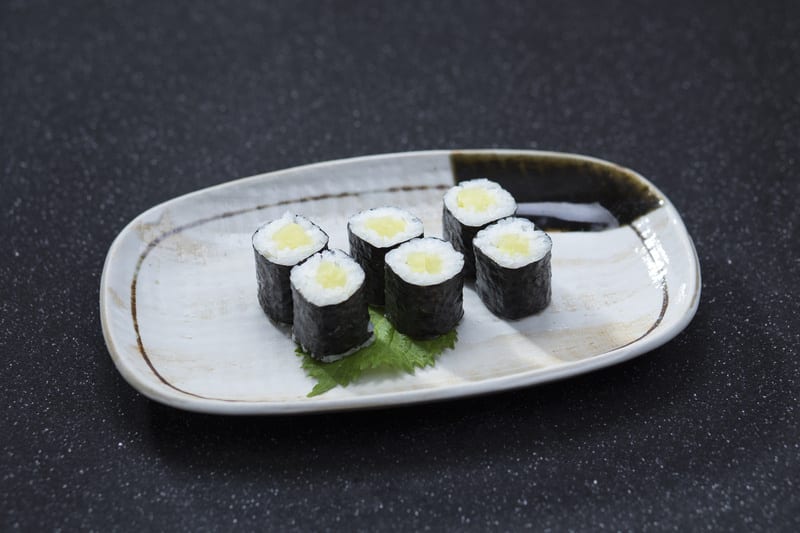
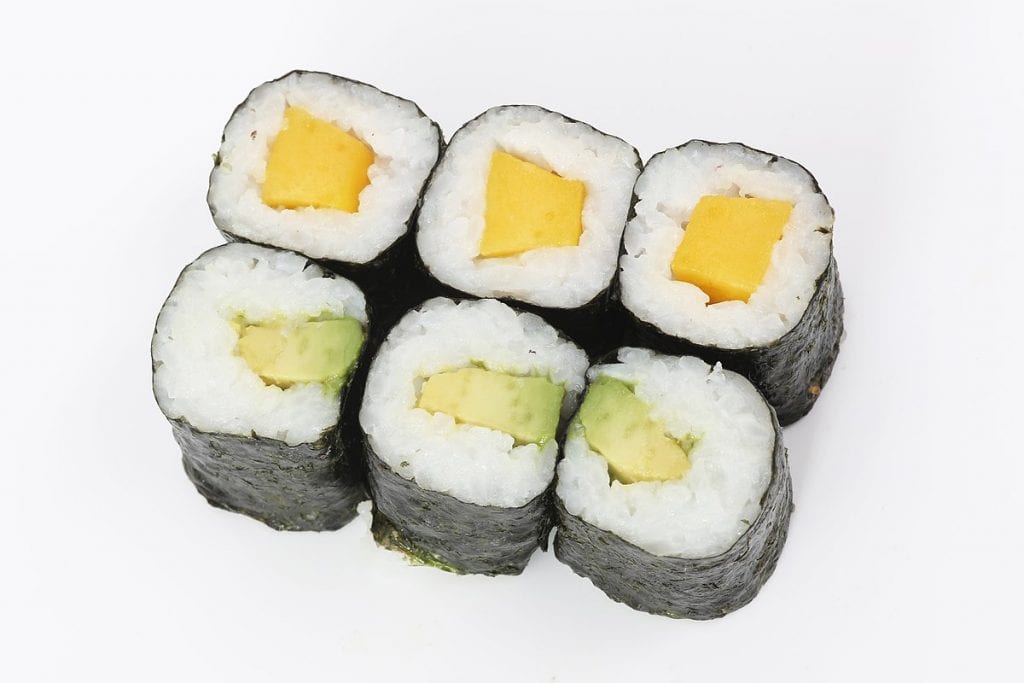
How to Make Oshinko Roll
Wikimedia Commons | Tim Reckmann
If you’ve frequented a couple of Japanese restaurants already, you have probably tried oshinko maki. If you haven’t and are wondering what oshinko maki is, they are basically bite-sized rolls with pickled daikon radish at the center, wrapped in a nori (seaweed) sheet. They are also often called oshinko rolls.
If you want to re-create or try this at home, you only need a few ingredients and a makisu (bamboo mat). Here’s how you can make it:
- Make sushi rice. To make authentic Japanese maki, make sure to use short-grain rice. Its sticky consistency will help your maki stick together. Cook at least three cups of rice and once it’s cooked and still warm, mix it with sushi vinegar (⅓ cup vinegar, three tablespoons sugar, and 1½ teaspoon salt).
- Prepare oshinko strips. Next, slice your pickled daikon radish lengthwise into ¼-inch strips.
- Cut nori sheets. Using a scissor, cut nori sheets according to your preference.
- Roll the maki. Start by wetting your hands with water and vinegar so the rice doesn’t stick. Lay the bamboo mat and place the nori sheets on the top, the shiny side facing downwards. Then, spread thin rice on top of the nori sheet. Make sure to leave ½ inch of space on top. Next, place the pickled radish on top of the rice and roll.
- Cut the maki roll. The last step is to cut the maki rolls into equal pieces.
- Refrigerate. Store in the fridge for at least two to three days to give it ample pickling time.
The trick to rolling maki is by rolling the bamboo while pressing the filling together. You can start at the top or the bottom. Whatever technique is the most comfortable is the best way to do it.
READ ALSO: 30 Vegetarian Instant Pot Recipes
Conclusion
A Japanese meal is not complete without a good palate cleanser like oshinko. If you feel a little creative, you can even use it to make your very own oshinko sushi or maki! Plus, it’s a good addition to your favorite pickled vegetables!
Was this page helpful?
Related Articles

Pairing Coffee with Foods: A Flavor Journey

Can You Freeze Yogurt? Yes, Here Are 4 Ways!

7 Secret Kitchen Hacks of Restaurant Chefs
What Is Mortadella and 3 Recipes to Try
What Is Bean Curd? Learn All About It & How To Cook and Store It
What Is Tamarind Paste? Learn All About Its Uses and Its Substitutes
Chow Mein vs Lo Mein: How Exactly Are They Different?
4 Mexican Oregano Substitutes You Didn’t Know About
40 Best Ramen Toppings for Your Homemade Noodle Soup

How to Store Corn on the Cob: 4 Sure Methods to Store and Pick Corn
How to Freeze Corn on the Cob: 5 Ways to Freeze Your Corn Right
