Immerse yourself in the world of delightful desserts with our Mini Red Velvet Cheesecakes. These mini treats pack a flavorful punch of the classic red velvet cake fused with creamy cheesecake. Comprised of a red velvet cookie layer and a luscious cheesecake layer, this recipe promises a mouth-watering experience that's perfect for any occasion.


While most ingredients are common pantry items, a few may need a special trip to the supermarket. Red food coloring is essential to achieve the distinct hue of red velvet. Full fat cream cheese is preferred for a richer, creamier cheesecake layer. Semi-sweet chocolate chips are incorporated into the cream cheese mixture for an added layer of flavor. Remember, investing in quality ingredients will make your Mini Red Velvet Cheesecakes all the more delicious.
Ingredients for Mini Red Velvet Cheesecakes
All purpose flour: The foundation of the red velvet cookie layer, providing structure to your mini cheesecakes.
Cocoa powder: Gives a subtle chocolate flavor to the red velvet cookie layer.
Baking soda: A leavening agent that helps the red velvet cookie base rise.
Salt: Enhances the flavors of the other ingredients.
Unsalted butter: Adds moisture and rich flavor to the cookie base.
Brown sugar and granulated sugar: Sweeteners that also contribute to the texture of the cookie base.
Egg: Binds the ingredients together.
Milk: Adds moisture to the dough.
Vanilla extract: Enhances the flavor of the cookie and cheesecake layers.
Red food coloring: Gives the distinctive red color to the velvet cookie layer.
Full fat cream cheese: The main ingredient of the cheesecake layer, provides a rich and creamy texture.
Yogurt: Adds a tangy flavor to balance the sweetness of the cheesecake.
Mini or regular semi sweet chocolate chips: Gives a delightful surprise of melted chocolate in every bite.
One reader, Deb Deangelis says:

These mini red velvet cheesecakes are a delightful treat! The red velvet cookie layer adds a perfect crunch, and the creamy cheesecake layer is simply divine. The combination of flavors is heavenly, and they are so easy to make. I highly recommend trying this recipe for a delightful dessert experience!
Techniques Required for Making Mini Red Velvet Cheesecakes
Preheat oven: Preheat the oven to 350 degrees F and line two 12-count muffin pans with cupcake liners. Set aside.
Prepare red velvet cookie layer: Combine the dry ingredients in a large bowl and mix the wet ingredients in a separate bowl. Gradually add the dry ingredients to the wet ingredients and mix until a soft dough forms. Press 1 scant tablespoon of cookie dough into the bottom of each cupcake liner and bake for 8 minutes to pre-bake the crust.
Prepare cheesecake layer: Beat the cream cheese until smooth, then add yogurt, sugar, egg, and vanilla. Gently fold in the chocolate chips.
Bake the mini cheesecakes: Dollop 1 tablespoon of cheesecake batter on top of the pre-baked cookie, spreading it to cover the cookie. Bake for about 20 more minutes until the cheesecake no longer jiggles when shaken.
Cool and store: Allow the mini cheesecakes to cool for 30 minutes on the counter, then refrigerate for another 1.5 hours to set. Store the cookie cups at room temperature for 12 to 24 hours, then refrigerate for up to 3 more days. The cheesecakes can be frozen for up to 2 months and should be thawed overnight in the refrigerator before enjoying.
How To Make Mini Red Velvet Cheesecakes
These red velvet cheesecakes are baked with a sweet cookie base layered with chocolate chip-studded cream cheese topping.
Serves:
Ingredients
For Red Velvet Cookie Layer:
- 1½cupsall purpose flour,plus 1 tbsp, spoon & leveled
- ¼cupcocoa powder,unsweetened
- 1tspbaking soda
- ¼tspsalt
- ½cupunsalted butter,softened to room temperature
- ¾cuplight or dark brown sugar,packed
- ¼cupgranulated sugar
- 1egg,at room temperature
- 1tbspmilk
- 2tsppure vanilla extract
- 1tbspred food coloring,liquid or gel
For Cheesecake Layer:
- 12ozfull fat cream cheese,softened to room temperature
- 2tbspyogurt
- ⅓cupgranulated sugar
- 1large egg,at room temperature
- 1tsppure vanilla extract
- ½cupmini or regular semi sweet chocolate chips
Instructions
-
Preheat oven to 350 degrees F. Line two 12-count muffin pans with cupcake liners. Set aside.
-
Toss the flour, cocoa powder, baking soda, and salt together in a large bowl. Set aside.
-
Using a handheld or stand mixer with a paddle attachment, beat the butter at high speed for about 1 minute until creamy. Scrape down the sides and the bottom of the bowl as needed.
-
Switch the mixer to medium speed and beat in the brown sugar and granulated sugar until combined. Beat in the egg, milk, and vanilla extract, scraping down the sides and bottom of the bowl as needed.
-
Once mixed, add the food coloring and beat until combined. Turn the mixer off and pour the dry ingredients into the wet ingredients.
-
Turn the mixer on low and slowly beat until a very soft dough is formed. Beat in more food coloring if desired. The dough will be sticky.
-
Press 1 scant tablespoon of cookie dough into the bottom of each cupcake liner. Bake each batch for 8 minutes to pre-bake the crust before layering the cheesecake on top.
Cheesecake Layer:
-
Using a handheld or stand mixer with a paddle attachment, beat the cream cheese on medium-high until completely smooth.
-
Add the yogurt and sugar, beating on high until combined. Add the egg and vanilla and beat on medium until combined. Try not to overbeat, which will cause cheesecake cracks.
-
Gently fold in the chocolate chips. Dollop 1 tablespoon of cheesecake batter on top of the pre-baked cookie, spreading it to make sure it completely covers the cookie.
To Bake:
-
Return the mini cheesecakes to the oven and continue to bake for about 20 more minutes, making sure the tops of the cheesecake do not get too brown.
-
The cups are done in the oven when the cheesecake topping no longer jiggles when shaken. Cover the cups with aluminum foil if the tops are getting too brown too soon.
-
Allow to cool for 30 minutes on the counter, then in the refrigerator to set for another 1.5 hours.
-
Cookie cups stay fresh covered at room temperature for 12 to 24 hours, and then must be refrigerated after that for up to 3 more days.
-
Cheesecakes can be frozen for up to 2 months. Thaw overnight in the refrigerator before enjoying.
Nutrition
- Calories: 174.41kcal
- Fat: 10.40g
- Saturated Fat: 6.05g
- Trans Fat: 0.16g
- Monounsaturated Fat: 2.78g
- Polyunsaturated Fat: 0.50g
- Carbohydrates: 18.85g
- Fiber: 0.76g
- Sugar: 11.88g
- Protein: 2.57g
- Cholesterol: 40.40mg
- Sodium: 113.19mg
- Calcium: 26.80mg
- Potassium: 70.91mg
- Iron: 0.76mg
- Vitamin A: 91.06µg
- Vitamin C: 0.01mg
Helpful Technique for Mini Red Velvet Cheesecakes Recipe
When making these mini red velvet cheesecakes, it's crucial to avoid overbeating the cheesecake batter. Overbeating can incorporate too much air into the mixture, which can lead to cracks in the cheesecake during baking. To prevent this, beat the ingredients at a medium speed until they are just combined. Also, remember to scrape down the sides and bottom of the bowl frequently to ensure all ingredients are evenly mixed.
Time-Saving Tips for Mini Red Velvet Cheesecakes Recipe
Prep ahead: Prepare the red velvet cookie layer and cheesecake layer a day in advance and store them in the refrigerator. This will save time on the day you plan to bake the mini red velvet cheesecakes.
Use a food processor: Use a food processor to quickly mix the red velvet cookie dough. This will save time and ensure a consistent texture.
Room temperature ingredients: Ensure that the cream cheese, egg, and yogurt are at room temperature before starting the recipe. This will help the ingredients mix together more easily and save time during the preparation process.
Bake in batches: If you only have one muffin pan, bake the mini red velvet cheesecakes in batches. While one batch is baking, prepare the next batch to maximize efficiency.
Chill the crust: While the cookie layer is pre-baking, prepare the cheesecake layer. This will save time and ensure that the layers are ready to be assembled without delay.
Substitute Ingredients For Mini Red Velvet Cheesecakes Recipe
all purpose flour - Substitute with gluten-free all purpose flour: This substitution is suitable for those who are gluten intolerant or have celiac disease. It provides a gluten-free alternative without compromising the texture of the red velvet cookie layer.
unsalted butter - Substitute with coconut oil: Coconut oil can be used as a dairy-free alternative for those who are lactose intolerant or following a vegan diet. It also adds a subtle coconut flavor to the recipe.
light or dark brown sugar - Substitute with coconut sugar: Coconut sugar is a natural sweetener that can be used as a lower glycemic index alternative to brown sugar. It adds a hint of caramel flavor to the red velvet cookie layer.
granulated sugar - Substitute with maple syrup: Maple syrup can be used as a natural sweetener and adds a unique flavor to the red velvet cookie layer. It also provides a liquid component to the recipe.
egg - Substitute with flaxseed or chia seed egg: A flaxseed or chia seed egg can be used as a vegan alternative to eggs in the recipe. To make a flaxseed or chia seed egg, mix 1 tablespoon of ground flaxseeds or chia seeds with 3 tablespoons of water and let it sit for a few minutes until it forms a gel-like consistency.
milk - Substitute with almond milk: Almond milk can be used as a dairy-free alternative in the recipe. It adds a subtle nutty flavor and works well with the other ingredients.
full fat cream cheese - Substitute with vegan cream cheese: Vegan cream cheese is a dairy-free alternative suitable for those following a vegan diet or have lactose intolerance. It provides a creamy texture and tangy flavor similar to traditional cream cheese.
yogurt - Substitute with coconut yogurt: Coconut yogurt is a dairy-free alternative that can be used in place of regular yogurt. It adds a hint of coconut flavor and provides a creamy texture to the cheesecake layer.
semi sweet chocolate chips - Substitute with vegan chocolate chips: Vegan chocolate chips are a dairy-free alternative suitable for those following a vegan diet or have lactose intolerance. They provide the same chocolatey flavor and texture as traditional chocolate chips.
Presenting Mini Red Velvet Cheesecakes
Elevate the red velvet cookie layer: Instead of a traditional cookie base, create a delicate red velvet cookie layer that is thin and perfectly baked, providing a delightful contrast in texture to the creamy cheesecake.
Garnish with edible flowers: Add a touch of elegance by garnishing the mini red velvet cheesecakes with delicate edible flowers, such as pansies or rose petals, to bring a pop of color and a subtle floral aroma to the plate.
Incorporate chocolate art: Elevate the visual appeal by incorporating intricate chocolate art on the plate, such as delicate chocolate curls or shards, adding a touch of sophistication and a hint of decadence to the dessert.
Utilize gold leaf accents: For a luxurious touch, delicately place gold leaf accents on the plate, adding a shimmering and opulent element that complements the rich flavors of the red velvet and cheesecake.
Present in individual glass domes: Serve the mini red velvet cheesecakes under individual glass domes to create a sense of anticipation and drama, allowing the guests to unveil the dessert and experience a moment of culinary delight.
Essential Tools for Making Mini Red Velvet Cheesecakes
Mixing bowl: A mixing bowl is essential for combining ingredients and mixing the red velvet cookie layer and the cheesecake layer.
Muffin pans: Muffin pans are used to bake the mini red velvet cheesecakes.
Handheld or stand mixer: A handheld or stand mixer is used to beat the ingredients for the red velvet cookie layer and the cheesecake layer until smooth and well combined.
Cupcake liners: Cupcake liners are used to line the muffin pans and prevent the mini red velvet cheesecakes from sticking.
Measuring cups and spoons: Measuring cups and spoons are used to accurately measure the ingredients for both the red velvet cookie layer and the cheesecake layer.
Spatula: A spatula is used to fold in the chocolate chips into the cheesecake layer and to spread the cheesecake batter over the pre-baked cookie layer.
Aluminum foil: Aluminum foil is used to cover the mini red velvet cheesecakes while baking to prevent the tops from getting too brown too soon.
Oven: The oven is used to bake the mini red velvet cheesecakes at 350 degrees Fahrenheit.
Storing and Freezing Mini Red Velvet Cheesecakes
These mini red velvet cheesecakes can be stored at room temperature, covered, for up to 24 hours. After that, they must be refrigerated for up to 3 more days to maintain their freshness and prevent spoilage.
If you want to keep the cheesecakes for a longer period, you can freeze them for up to 2 months:
- Place the cooled cheesecakes on a baking sheet or plate and freeze them until they are firm (about 1-2 hours).
- Once frozen, wrap each cheesecake individually in plastic wrap or aluminum foil to prevent freezer burn.
- Place the wrapped cheesecakes in a freezer-safe container or zip-lock bag, label with the date, and store in the freezer.
To thaw the frozen cheesecakes:
- Remove them from the freezer and place them in the refrigerator overnight to allow them to thaw gradually.
- Once thawed, you can serve the cheesecakes chilled or let them come to room temperature for a softer texture.
- Note: Thawed cheesecakes may have a slightly different texture compared to freshly baked ones, but they will still taste delicious!
If you have any leftover cream cheese frosting or toppings, store them separately in airtight containers in the refrigerator for up to 3 days.
Interesting Fact About Mini Red Velvet Cheesecakes
This recipe is a delightful fusion of red velvet and cheesecake, creating a perfect balance of flavors and textures. The addition of chocolate chips in the cheesecake layer adds a delightful surprise with every bite.
Is Making Mini Red Velvet Cheesecakes at Home Cost-Effective?
This mini red velvet cheesecakes recipe is moderately cost-effective for a household. The ingredients, such as cream cheese, chocolate chips, and cocoa powder, are commonly found in most kitchens. However, the use of red food coloring and semi-sweet chocolate chips may require an additional purchase. The overall verdict for this recipe is 8/10, considering the delightful combination of red velvet cookie layer and creamy cheesecake layer. The approximate cost for a household of 4 people is around $15-$20, making it a reasonable dessert option for special occasions.
Are Mini Red Velvet Cheesecakes Healthy or Unhealthy?
This recipe for mini red velvet cheesecakes is undeniably delicious, but it's not the healthiest choice. The main culprits are the high amounts of butter, sugar, and cream cheese, which contribute to the rich flavor but also add significant amounts of saturated fat and calories. The use of all-purpose flour and chocolate chips further increases the carbohydrate and sugar content. While the recipe does include some yogurt, which provides a small amount of protein and calcium, it's not enough to offset the less healthy ingredients.
To make this recipe healthier, consider the following modifications:
- Replace some of the all-purpose flour with whole wheat pastry flour or almond flour to increase fiber and nutrient content
- Reduce the amount of sugar in both the cookie layer and cheesecake layer, or use a natural sweetener like stevia or monk fruit
- Swap out the butter for a healthier alternative like coconut oil or Greek yogurt
- Use reduced-fat cream cheese instead of full-fat to lower the saturated fat content
- Incorporate more yogurt into the cheesecake layer to boost protein and calcium
- Opt for dark chocolate chips with a higher cocoa content for added antioxidants and less sugar
Editor's Opinion on Mini Red Velvet Cheesecakes
The mini red velvet cheesecake recipe is a delightful twist on a classic dessert. The combination of the red velvet cookie layer and creamy cheesecake topping creates a perfect balance of flavors and textures. The addition of chocolate chips adds a delightful surprise in every bite. The recipe's clear instructions and detailed steps make it accessible for both novice and experienced bakers. The result is a charming and indulgent treat that is sure to impress friends and family. Whether served at a special occasion or enjoyed as a sweet indulgence, these mini red velvet cheesecakes are a delightful addition to any dessert spread.
Enhance Your Mini Red Velvet Cheesecakes Recipe with These Unique Side Dishes:
Recipes Similar to Mini Red Velvet Cheesecakes
Appetizers and Main Courses to Serve with Mini Red Velvet Cheesecakes
Why trust this Mini Red Velvet Cheesecakes Recipe:
This recipe is a delightful fusion of classic red velvet and creamy cheesecake flavors, creating a luscious treat that will captivate your taste buds. The cookie layer adds a delightful crunch, while the velvety cheesecake layer is studded with mini chocolate chips, adding a delightful surprise in every bite. The careful balance of ingredients and precise instructions ensures a perfect result every time. Trust in the expertise and passion behind this recipe, and indulge in the decadent harmony of flavors and textures.
Was this page helpful?
Have your own special recipe to share? Submit Your Recipe Today!
Related Recipes
Easy Red Velvet Cheesecake Recipe
Best Red Velvet Cake Recipe
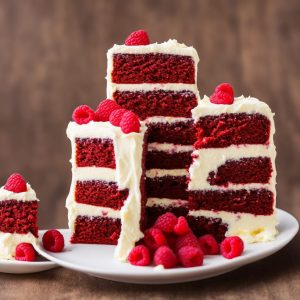
Raspberry Red Velvet Cake Recipe

Holiday Prime Rib Recipe

White Chocolate Cranberry Pistachio Biscotti Recipe

Emily’s Excellent Taco Casserole Recipe
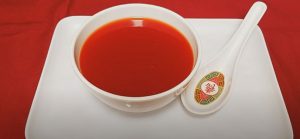
Pineapple Sweet and Sour Sauce Recipe

Spaghetti Squash Alfredo Recipe

Somali Spaghetti Sauce Recipe
Watermelon Mint Ice Cream Recipe

Raspberry Lemon Drop Martini Recipe