Mastering the Art of Kneading Scone Dough
There’s nothing quite like the aroma of freshly baked scones wafting through the kitchen. Whether you’re a seasoned baker or just starting out, mastering the art of kneading scone dough is essential for achieving that perfect texture and flavor. In this guide, we’ll take you through the steps to knead scone dough like a pro.
Understanding the Importance of Kneading
Kneading is a crucial step in the scone-making process. It helps develop the gluten in the dough, giving the scones their characteristic texture and structure. Proper kneading ensures that the ingredients are evenly distributed and creates the ideal foundation for light, fluffy scones.
Step-by-Step Guide to Kneading Scone Dough
Follow these simple steps to knead scone dough to perfection:
- Prepare Your Work Surface: Before you begin, clear and clean a flat surface for kneading. Dust it lightly with flour to prevent the dough from sticking.
- Gather Your Dough: Place your scone dough onto the floured surface. Use a spatula or scraper to ensure you get all of the dough out of the bowl.
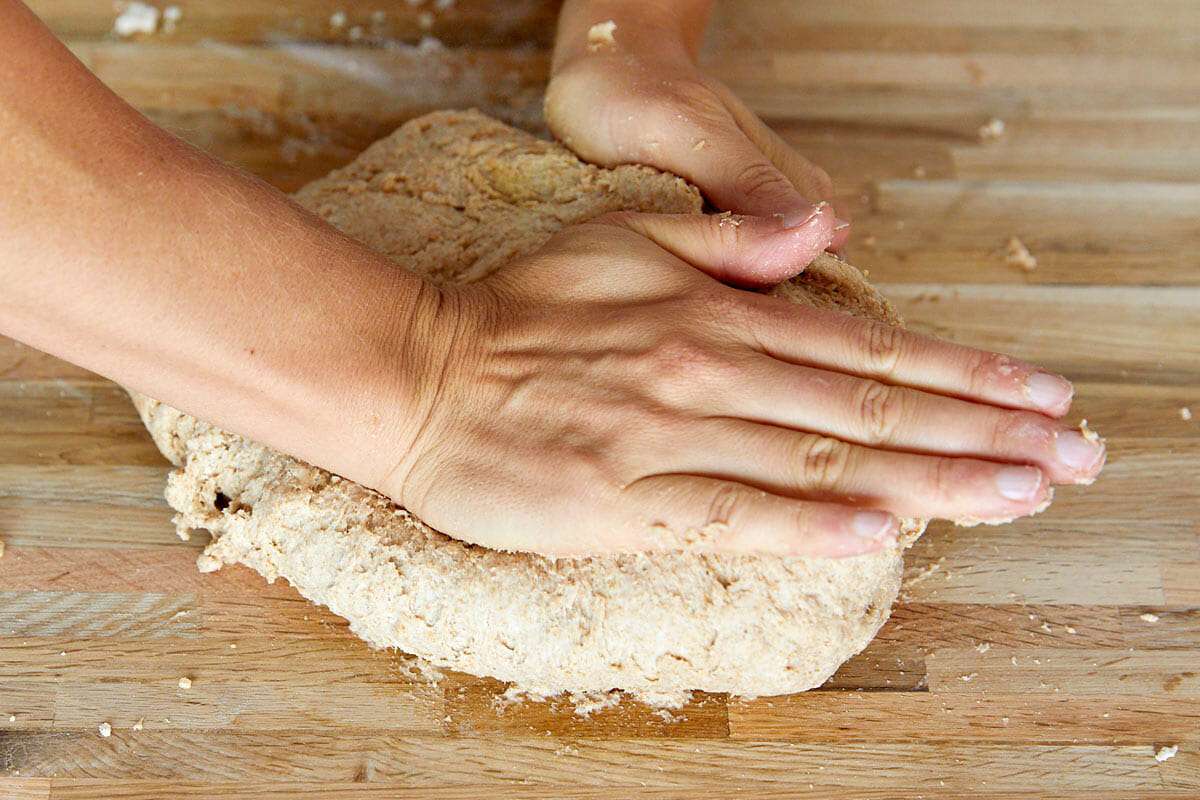
- Use Proper Technique: With the heel of your hand, gently push the dough away from you. Then, fold it back towards you. Rotate the dough a quarter turn and repeat this process.
- Apply Even Pressure: As you knead, apply even pressure to the dough. Be careful not to overwork it, as this can result in tough scones.
- Check for Consistency: Knead the dough for the specified time in the recipe, or until it reaches the desired consistency. It should be smooth, elastic, and slightly sticky.
- Rest the Dough: Once kneaded, shape the dough into a round disk and let it rest for a few minutes. This allows the gluten to relax and makes the dough easier to work with.
Tips for Successful Kneading
Here are some additional tips to help you achieve perfect scone dough:
- Use Cold Ingredients: For the best results, use cold butter and liquid ingredients when making scone dough. This helps create a flaky texture.
- Don’t Overwork the Dough: Be mindful not to over-knead the dough, as this can lead to tough scones. Stop kneading as soon as the dough comes together and has a uniform texture.
- Practice Patience: Kneading takes time and patience. Don’t rush the process, as proper kneading is essential for light and tender scones.
- Experiment with Add-Ins: Once you’ve mastered the basic kneading technique, feel free to experiment with adding fruits, nuts, or other flavorings to your scone dough.
Conclusion
Kneading scone dough is a fundamental skill for any baker. By following the steps outlined in this guide and keeping these tips in mind, you’ll be well on your way to creating delicious, bakery-worthy scones in your own kitchen. So, roll up your sleeves, dust off your work surface, and get ready to knead your way to scone success!
For anyone looking to put their scone-kneading skills to use, there are plenty of delicious recipes to try. Fans of fruity flavors might enjoy the Blueberry Scones Recipe or the Strawberry Scones Recipe, both of which are great for breakfast or a sweet snack. Those with a taste for something a bit more decadent could try the Chocolate Chip Scones Recipe or the Double Chocolate Scones Recipe, perfect for satisfying a sweet tooth. For a more savory twist, the Savory Cheddar and Chive Scones Recipe and Herb and Feta Scones Recipe offer a delightful change of pace and are excellent for a brunch or snack. Each recipe allows bakers to practice the kneading techniques outlined in the guide, ensuring perfect scones every time.
